Seam carving
Mikko Koppanen February 13th, 2008
Today I was reading trough the ImageMagick ChangeLog and noticed an interesting entry. "Add support for liquid rescaling". I rushed to check the MagickWand API docs and there it was: MagickLiquidRescaleImage! After about ten minutes of hacking the Imagick support was done. Needless to say; I was excited 
For those who don't know what seam carving is check the demo here. More detailed information about the algorithm can be found here: "Seam Carving for Content-Aware Image Resizing" by Shai Avidan and Ariel Shamir
To use this functionality you need to install at least ImageMagick 6.3.8-2 and liblqr. Remember to pass --with-lqr to ImageMagick configuration line. You can get liblqr here: http://liblqr.wikidot.com/. The Imagick side of the functionality should appear in the CVS today if everything goes as planned.
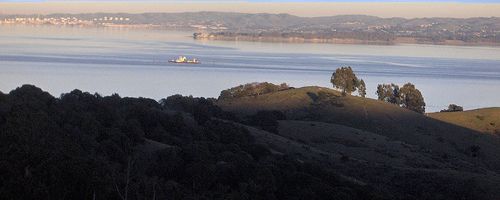
Here is a really simple example just to illustrate the results of the operation. The parameters might be far from optimal (didn't do much testing yet). The original dimensions of image are 500x375 and the resulting size is 500x200.
Update: the functionality is pending until license issues are solved.
The original image by flickr/jennconspiracy
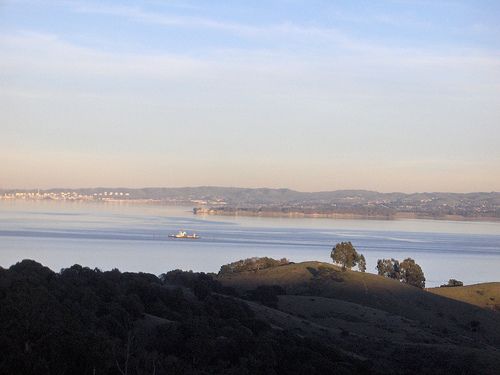
And the result:
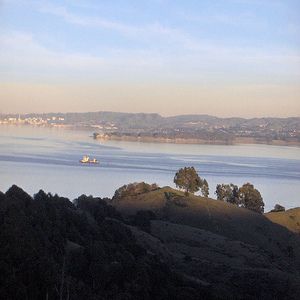
Update. On kenrick's request here is an image which is scaled down to 300x300
Typesetting
Mikko Koppanen January 17th, 2008
Ever had the situation where you have a piece of string which you need to overlay on an image? Maybe a situation where the area reserved for the string is known in pixels but you need to know the font size to fill most of the area? Think no more!
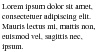
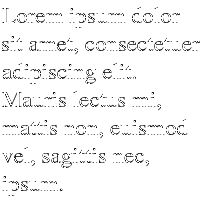
Here is a small example of how to fit a certain piece of a string on to an area of which you know the width and the height or only the width. The magic happens through the ImageMagick CAPTION: format. You can see from the example images how the parameters actually affect the image.
- <?php
- /* How wide is our image */
- $image_width = 200;
- /* Give zero for autocalculating the height */
- $image_height = 200;
- /* Specify the text */
- $text = "Lorem ipsum dolor sit amet, consectetuer adipiscing elit.
- Mauris lectus mi, mattis non, euismod vel, sagittis nec, ipsum.";
- /* Instanciate imagick */
- $im = new Imagick();
- /* Create new image using caption: pseudo format */
- $im->newPseudoImage( $image_width, $image_height, "caption:" . $text );
- /* Put 1px border around the image */
- $im->borderImage( 'black', 1, 1 );
- /* PNG format */
- $im->setImageFormat( "png") ;
- /* Output */
- header( "Content-Type: image/png" );
- echo $im;
- ?>
Here is image with width 100 and height 0:
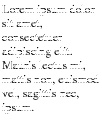
Width 100 Height 50:
Width 200 Height 200 (as you can see the font size is now larger):
Padding thumbnail with color
Mikko Koppanen January 11th, 2008
I know, it's been a while since I last blogged. This is because a lot of things are happening in my personal life. I recently relocated to London from Finland and started a new job. Things are quite busy but I will try to post an example now and then. In the meanwhile I would like to hear about sites using Imagick, so if your project is not super secret please post an url and maybe a small explanation what you're doing with Imagick on the site. This is purely for my personal interest.
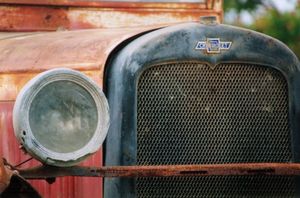
Anyway, to the point. Today's example originates from a question asked by a user. How do I thumbnail the image inside given dimensions proportionally and fill the "blank" areas with a color? Well, the answer is here
The code is for Imagick 2.1.0 but adapting to older versions should not be hard.
- <?php
- /* Define width and height of the thumbnail */
- $width = 100;
- $height = 100;
- /* Instanciate and read the image in */
- $im = new Imagick( "test.png" );
- /* Fit the image into $width x $height box
- The third parameter fits the image into a "bounding box" */
- $im->thumbnailImage( $width, $height, true );
- /* Create a canvas with the desired color */
- $canvas = new Imagick();
- $canvas->newImage( $width, $height, 'pink', 'png' );
- /* Get the image geometry */
- $geometry = $im->getImageGeometry();
- /* The overlay x and y coordinates */
- $x = ( $width - $geometry['width'] ) / 2;
- $y = ( $height - $geometry['height'] ) / 2;
- /* Composite on the canvas */
- $canvas->compositeImage( $im, imagick::COMPOSITE_OVER, $x, $y );
- /* Output the image*/
- header( "Content-Type: image/png" );
- echo $canvas;
- ?>
The source image:
The resulting image:

Creating buttons with Imagick
Mikko Koppanen November 21st, 2007
A fellow called kakapo asked me to create a button with Imagick. He had an image of the button and a Photoshop tutorial but unfortunately the tutorial was in Chinese. My Chinese is a bit rusty so it will take a little longer to create that specific button 
The button in this example is created after this tutorial http://xeonfx.com/tutorials/easy-button-tutorial/ (yes, I googled "easy button tutorial"). The code and the button it creates are both very simple but the effect looks really nice.
Here we go with the code:
- <?php
- /* Create a new Imagick object */
- $im = new Imagick();
- /* Create empty canvas */
- $im->newImage( 200, 200, "white", "png" );
- /* Create the object used to draw */
- $draw = new ImagickDraw();
- /* Set the button color.
- Changing this value changes the color of the button */
- $draw->setFillColor( "#4096EE" );
- /* Create the outer circle */
- $draw->circle( 50, 50, 70, 70 );
- /* Create the smaller circle on the button */
- $draw->setFillColor( "white" );
- /* Semi-opaque fill */
- $draw->setFillAlpha( 0.2 );
- /* Draw the circle */
- $draw->circle( 50, 50, 68, 68 );
- /* Set the font */
- $draw->setFont( "./test1.ttf" );
- /* This is the alpha value used to annotate */
- $draw->setFillAlpha( 0.17 );
- /* Draw a curve on the button with 17% opaque fill */
- $draw->bezier( array(
- array( "x" => 10 , "y" => 25 ),
- array( "x" => 39, "y" => 49 ),
- array( "x" => 60, "y" => 55 ),
- array( "x" => 75, "y" => 70 ),
- array( "x" => 100, "y" => 70 ),
- array( "x" => 100, "y" => 10 ),
- ) );
- /* Render all pending operations on the image */
- $im->drawImage( $draw );
- /* Set fill to fully opaque */
- $draw->setFillAlpha( 1 );
- /* Set the font size to 30 */
- $draw->setFontSize( 30 );
- /* The text on the */
- $draw->setFillColor( "white" );
- /* Annotate the text */
- $im->annotateImage( $draw, 38, 55, 0, "go" );
- /* Trim extra area out of the image */
- $im->trimImage( 0 );
- /* Output the image */
- header( "Content-Type: image/png" );
- echo $im;
- ?>
And here is a few buttons I created by changing the fill color value:


Creating a reflection
Mikko Koppanen November 19th, 2007
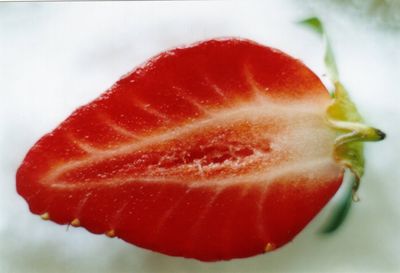
Here is a simple example of creating a reflection of an image. The reflection is created by flipping the image and overlaying a gradient on it. Then both, the original image and the reflection is overlayed on a canvas.
This example is created for Imagick 2.1.x but with a little tuning it should work with earlier versions.
- <?php
- /* Read the image */
- $im = new Imagick( "strawberry.png" );
- /* Thumbnail the image */
- $im->thumbnailImage( 200, null );
- /* Create a border for the image */
- $im->borderImage( "white", 5, 5 );
- /* Clone the image and flip it */
- $reflection = $im->clone();
- $reflection->flipImage();
- /* Create gradient. It will be overlayd on the reflection */
- $gradient = new Imagick();
- /* Gradient needs to be large enough for the image
- and the borders */
- $gradient->newPseudoImage( $reflection->getImageWidth() + 10,
- $reflection->getImageHeight() + 10,
- "gradient:transparent-black"
- );
- /* Composite the gradient on the reflection */
- $reflection->compositeImage( $gradient, imagick::COMPOSITE_OVER, 0, 0 );
- /* Add some opacity */
- $reflection->setImageOpacity( 0.3 );
- /* Create empty canvas */
- $canvas = new Imagick();
- /* Canvas needs to be large enough to hold the both images */
- $width = $im->getImageWidth() + 40;
- $height = ( $im->getImageHeight() * 2 ) + 30;
- $canvas->newImage( $width, $height, "black", "png" );
- /* Composite the original image and the reflection on the canvas */
- $canvas->compositeImage( $im, imagick::COMPOSITE_OVER, 20, 10 );
- $canvas->compositeImage( $reflection, imagick::COMPOSITE_OVER,
- 20, $im->getImageHeight() + 10 );
- /* Output the image*/
- header( "Content-Type: image/png" );
- echo $canvas;
- ?>
The source image:
And the result:
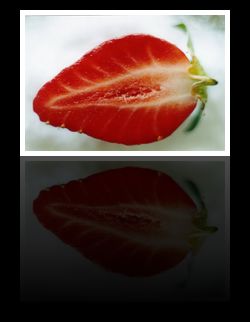
P.S. Please send me some new images which I can use in these examples
ImagickPixelIterator is not read-only after all..
Mikko Koppanen November 15th, 2007
A few days ago I got a help request from a user: "How do you change pixel color during the iteration with ImagickPixelIterator". My initial response was that ImagickPixelIterator is read-only.
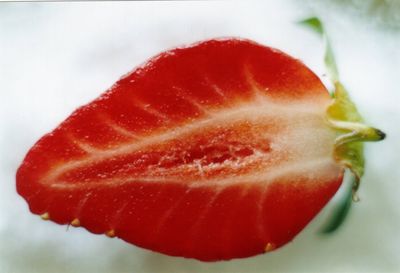
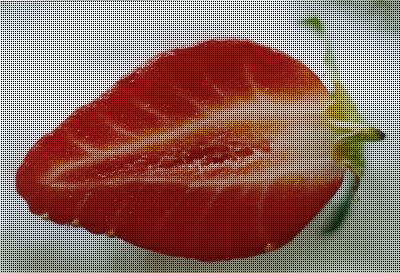
Well, I have to admit I was wrong. After searching trough ImageMagick docs I stumbled across an example and noticed that PixelIterator (and therefor ImagickPixelIterator) is not read-only after all. I have tried the code like in this example before; without the syncIterator call after each row. After adding the Imagick::syncIterator call everything worked as expected.
This example will work with Imagick 2.1.0 (the RC1 was released yesterday) but with a little tweaking it should work with 2.0.x too.
- <?php
- /* Create new object with the image */
- $im = new Imagick( "strawberry.png" );
- /* Get iterator */
- $it = $im->getPixelIterator();
- /* Loop trough pixel rows */
- foreach( $it as $row => $pixels )
- {
- /* For every second row */
- if ( $row % 2 )
- {
- /* Loop trough the pixels in the row (columns) */
- foreach ( $pixels as $column => $pixel )
- {
- /* Paint every second pixel black*/
- if ( $column % 2 )
- {
- $pixel->setColor( "black" );
- }
- }
- }
-
- /* Sync the iterator, this is important
- to do on each iteration */
- $it->syncIterator();
- }
- /* Display the image */
- header( "Content-Type: image/png" );
- echo $im;
- ?>
The source image:
The result image:
Color analysis
Mikko Koppanen November 5th, 2007
The idea for today's example comes from Jonathan. Jonathan was asking: "I’d like to request a tutorial. One thing I’d really like to know how to do is analyze an image for it’s color “palette”, or in other words, to find what the primary colors are that are used in an image."
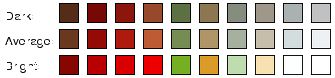
I don't know if this is exactly what he meant but I hope this example can be used as a kickstart for color analysis. The code in the example reduces the image colors to 10, then discards all but one pixel of every color and then creates the palettes out of those colors. This might not be the most accurate way to do this, but at least it's fast
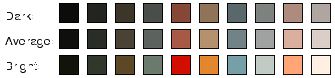
The code creates three different "palettes" from image; average palette, dark palette and bright palette. I got the idea for three different palettes from MarcosBL at freenode.
Here is the code:
- <?php
- /* The original image is the average colors */
- $average = new Imagick( "test.png" );
- /* Reduce the amount of colors to 10 */
- $average->quantizeImage( 10, Imagick::COLORSPACE_RGB, 0, false, false );
- /* Only save one pixel of each color */
- $average->uniqueImageColors();
- /* Clone the average and modulate to brighter */
- $bright = $average->clone();
- $bright->modulateImage ( 125, 200, 100 );
- /* Clone the average and modulate to darker */
- $dark = $average->clone();
- $dark->modulateImage ( 80, 100, 100 );
- /* Helper function to create the mini-images */
- function createImages( Imagick $composite, Imagick $im )
- {
- /* Get ImagickPixelIterator */
- $it = $im->getPixelIterator();
-
- /* Reset the iterator to begin */
- $it->resetIterator();
- /* Loop trough rows */
- while( $row = $it->getNextIteratorRow() )
- {
- /* Loop trough columns */
- foreach ( $row as $pixel )
- {
- /* Create a new image which contains the color */
- $composite->newImage( 20, 20, $pixel );
- $composite->borderImage( new ImagickPixel( "black" ), 1, 1 );
- }
- }
- }
- /* This object holds the color images */
- $composite = new Imagick();
- /* Create "icons" for each palette */
- createImages( $composite, $dark );
- createImages( $composite, $average );
- createImages( $composite, $bright );
- /* Montage the color images into single image
- Ten images per row, three rows */
- $montage = $composite->montageImage( new imagickdraw(), "10x3+0+0",
- "20x20+4+3>", imagick::MONTAGEMODE_UNFRAME,
- "0x0+3+3" );
- /* Free some resources */
- $composite->destroy();
- /* Create an empty canvas */
- $canvas = new Imagick();
- $canvas->newImage( $montage->getImageWidth() + 55,
- $montage->getImageHeight(),
- new ImagickPixel( "white" ) );
- /* Display the canvas as png */
- $canvas->setImageFormat( "png" );
- /* Set font size to 12 points */
- $draw = new ImagickDraw();
- $draw->setFontSize( 12 );
- /* Create legends for each palette */
- $canvas->annotateImage( $draw, 5, 20, 0, "Dark: " );
- $canvas->annotateImage( $draw, 5, 45, 0, "Average: " );
- $canvas->annotateImage( $draw, 5, 70, 0, "Bright: " );
- /* Composite the montaged images next to texts */
- $canvas->compositeImage( $montage, Imagick::COMPOSITE_OVER, 55, 0 );
- /* Output the image */
- header( "Content-Type: image/png" );
- echo $canvas;
- ?>
Edited the example to work with 2.0.x
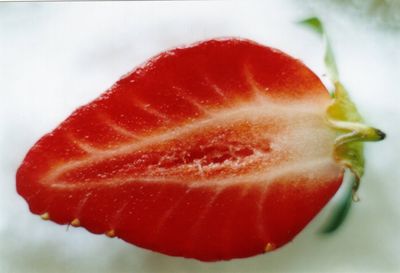
The first source image:
The created palette:
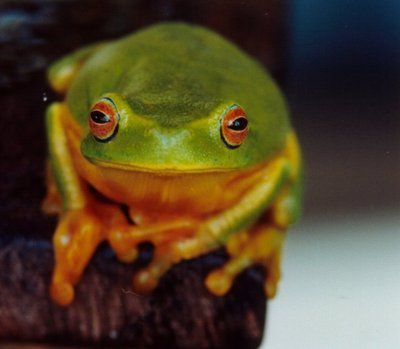
The second source image:
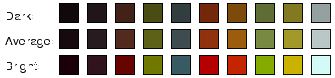
And the palette:
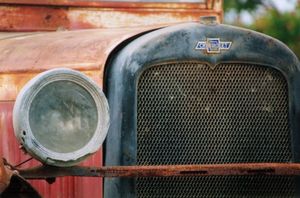
And one more:
Palette:
Trimming an image
Mikko Koppanen November 2nd, 2007
Especially product images usually "suffer" from this issue; the product itself is composited on a white background and there are large areas of white around the object.
This is a simple example to demonstrate how to easily trim the areas off the image and only display the parts where the object lies.
Imagick::trimImage takes one parameter which is "fuzz". Quoting ImageMagick manual: "By default target must match a particular pixel color exactly. However, in many cases two colors may differ by a small amount. The fuzz member of image defines how much tolerance is acceptable to consider two colors as the same. For example, set fuzz to 10 and the color red at intensities of 100 and 102 respectively are now interpreted as the same color for the purposes of the floodfill."
I use fuzz 0 in this example because the background color pixels are all same color.
- <?php
- /* Create the object and read the image in */
- $im = new Imagick( "test.png" );
- /* The background color. This is what we trim. */
- $im->setImageBackgroundColor( new ImagickPixel( "rgb(213,213,213)" ) );
- /* Trim the image. */
- $im->trimImage( 0 );
- /* Ouput the image */
- header( "Content-Type: image/" . $im->getImageFormat() );
- echo $im;
- ?>
The source image is a simple png image with black circle on gray background:

The trimmed image:

Analyzing image properties
Mikko Koppanen October 26th, 2007
Imagick provides various ways to identify image properties. These properties include for example some basic attributes like width, height, format and some more advanced attributes like exif tags, profiles and colorspaces.
This example will demonstrate a few basic ways to read these attributes from an image. The image used in this example is from www.exif.org and can be found here http://exif.org/samples/fujifilm-dx10.jpg.
The support for getImageProperties and getImageProfiles was added in ImageMagick version 6.3.5-9 and Imagick version 2.0.0RC4.
- <?php
- $im = new Imagick( "fujifilm-dx10.jpg" );
- $identify = $im->identifyImage();
- /* Ouput some basic attributes */
- echo '<b>Basic image properties:</b> <br />';
- echo 'Image geometry: ' , $identify['geometry']['width'] , 'x' , $identify['geometry']['height'] , '<br />';
- echo 'Image format: ' , $identify["format"] , '<br />';
- echo 'Image type: ' , $identify["type"] , '<br />';
- echo 'Image compression: ' , $identify["compression"] , '<br />';
- echo 'Image size: ' , $identify["fileSize"] , '<br />';
- echo '<br /><br />';
- echo '<b>All image properties:</b> <br />';
- /* Loop trough image properties */
- foreach ( $im->getImageProperties() as $k => $v )
- {
- echo $k , ' => ' , $v , '<br />';
- }
- echo '<br /><br />';
- echo '<b>All image profiles:</b> <br />';
- /* Same goes for properties */
- foreach ( $im->getImageProfiles() as $k => $v )
- {
- }
- ?>
The output looks something like this:
Basic image properties:
Image geometry: 1024x768
Image format: JPEG (Joint Photographic Experts Group JFIF format)
Image type: TrueColor
Image compression: JPEG
Image size: 129.955kb
All image properties:
exif:ApertureValue => 41/10
exif:BrightnessValue => -27/10
exif:ColorSpace => 1
exif:ComponentsConfiguration => ...
exif:CompressedBitsPerPixel => 14/10
exif:Compression => 6
exif:Copyright => J P Bowen
exif:DateTime => 2001:04:12 20:33:14
exif:DateTimeDigitized => 2001:04:12 20:33:14
exif:DateTimeOriginal => 2001:04:12 20:33:14
exif:ExifImageLength => 768
exif:ExifImageWidth => 1024
exif:ExifOffset => 258
exif:ExifVersion => 0210
exif:ExposureBiasValue => 0/10
exif:ExposureProgram => 2
exif:FileSource => .
exif:Flash => 1
exif:FlashPixVersion => 0100
exif:FNumber => 42/10
exif:FocalLength => 58/10
exif:FocalPlaneResolutionUnit => 3
exif:FocalPlaneXResolution => 2151/1
exif:FocalPlaneYResolution => 2151/1
exif:InteroperabilityIndex => R98
exif:InteroperabilityOffset => 708
exif:InteroperabilityVersion => 0100
exif:ISOSpeedRatings => 150
exif:JPEGInterchangeFormat => 856
exif:JPEGInterchangeFormatLength => 10274
exif:Make => FUJIFILM
exif:MaxApertureValue => 41/10
exif:MeteringMode => 5
exif:Model => DX-10
exif:Orientation => 1
exif:ResolutionUnit => 2
exif:SceneType => .
exif:SensingMethod => 2
exif:ShutterSpeedValue => 66/10
exif:Software => Digital Camera DX-10 Ver1.00
exif:XResolution => 72/1
exif:YCbCrPositioning => 2
exif:YResolution => 72/1
jpeg:colorspace => 2
jpeg:sampling-factor => 2x1,1x1,1x1
Signature => 434d8554488bf9af5fc551adeba43e6d1d04ac36559a02357cf5df93db4b35c5
All image profiles:
Profile name: exif (size: 11136)
摘自:http://valokuva.org/?cat=1


 發表文章
發表文章


